Sunday, 6 March 2016
Press nearly there.
Nearly finished the press. Just waiting for the trampoline springs that I'll be using instead of bungies.
Sunday, 28 February 2016
Shop Press Part II
Saw....
Drill...
Bolt together...
Getting there, need to make a way of holding the jack and the workpiece. Reckon a decent day in the shed will have it finished.
Drill...
Bolt together...
Getting there, need to make a way of holding the jack and the workpiece. Reckon a decent day in the shed will have it finished.
Sunday, 21 February 2016
Shop Press.
Take one 20 quid hydraulic jack
...add some steel from the scrapyard
and you have the ingredients of a shop press.
First step was cutting the rectangular box section I will be using for the cross pieces in half.
Next step was to remove the bits of plate welded to the box sections that I will be using for the uprights. This killed my grinder.
So I turned to drilling the holes in the cross pieces.
By doing this on the mill I know that they are exactly 650mm apart (+/- .01mm) this is possibly a bit of overkill.
So this is where I got to...
I reckon I've got enough scrap about the place to finish with little extra cost.
...add some steel from the scrapyard
and you have the ingredients of a shop press.
First step was cutting the rectangular box section I will be using for the cross pieces in half.
Next step was to remove the bits of plate welded to the box sections that I will be using for the uprights. This killed my grinder.
So I turned to drilling the holes in the cross pieces.
By doing this on the mill I know that they are exactly 650mm apart (+/- .01mm) this is possibly a bit of overkill.
So this is where I got to...
I reckon I've got enough scrap about the place to finish with little extra cost.
Sunday, 7 February 2016
A black bag of swarf
....is what I cleared up from on, under and around my lathe. It now looks like this.
I think I need to get into the habit of clearing the lathe (and mill) down after every use.
Before heading home I slung the XR seat on the Sportster to see how it looked with the 19" wheel on the rear.
Obviously the rear mudguard needs to go but it looks like quite an east job to fit.
I think I need to get into the habit of clearing the lathe (and mill) down after every use.
Before heading home I slung the XR seat on the Sportster to see how it looked with the 19" wheel on the rear.
Obviously the rear mudguard needs to go but it looks like quite an east job to fit.
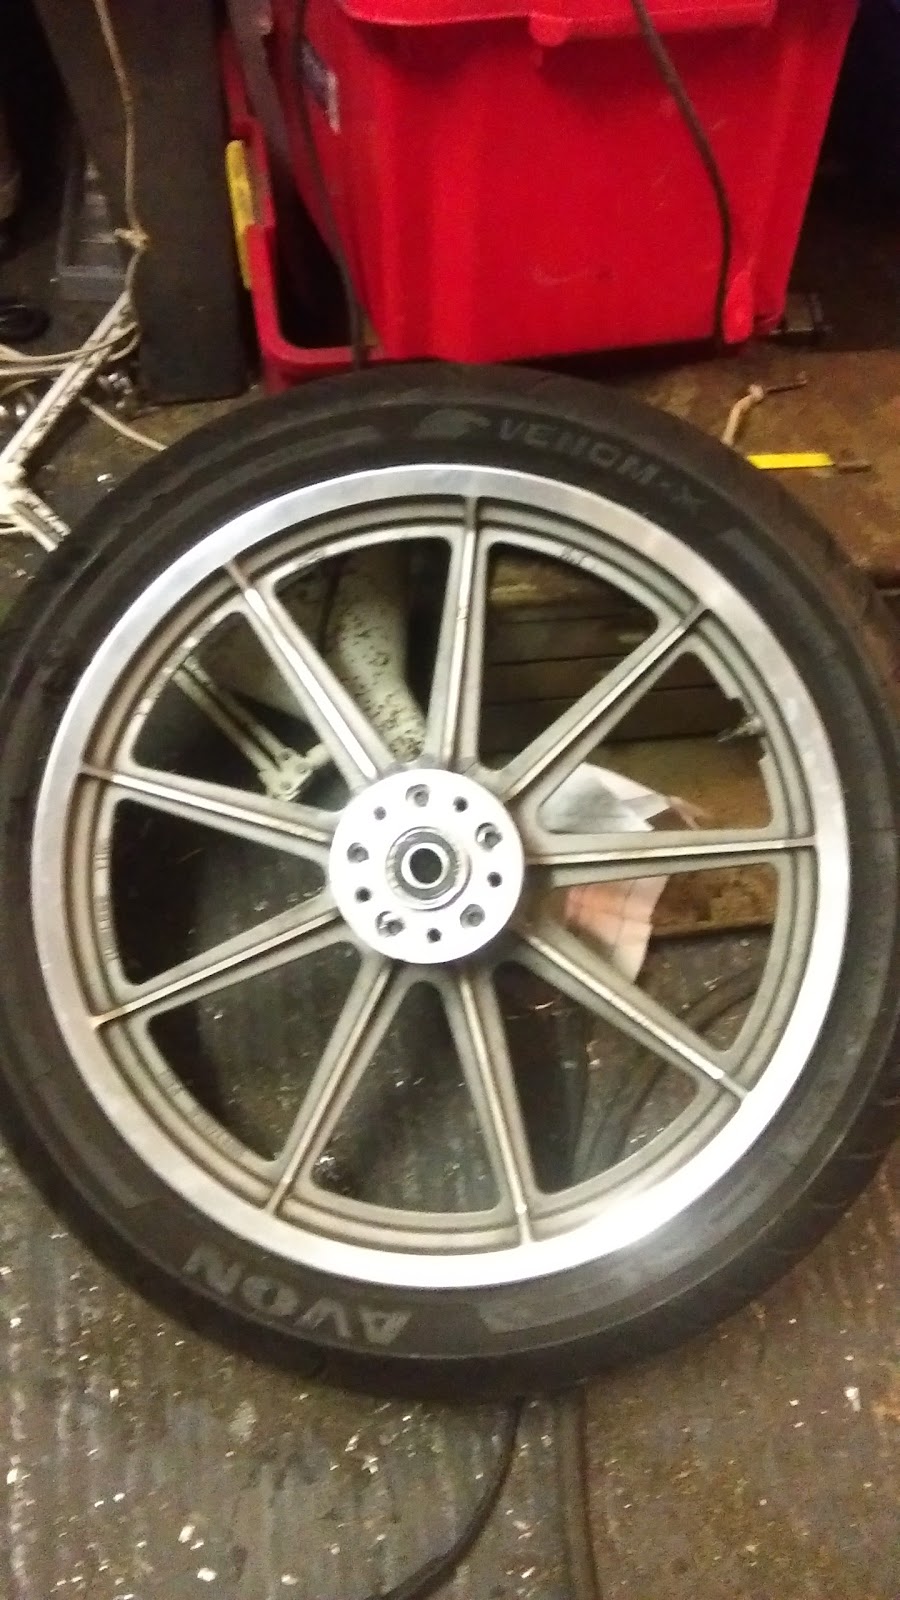
Rear wheel nearly done.
I machined the last of the spacers for my front to rear wheel conversion.
Everything seems to fit, I need to paint the wheel to match the front and fit the flattrack tyre.
Saturday, 6 February 2016
Tailstock unbroken
I fixed the tailstock on my lathe today. I drilled out the brass pins from the tailstock quill with a 6.5mm drill then used a 1/4" slot drill to make location holes in the ram nut. I then turned some brass down to a little over 1/4" for the replacement pins.
I then put some loctite bearing retaining compound on the sides of the holes (to accommodate the slightly oversize holes in the quill) and pressed the pins in place. This meant that once the loctite has set I could use the lathe to remove the excess on the locating pins.
So I ended up using my lathe to fix my lathe.
Monday, 25 January 2016
Oh bother
I had planned to spend the weekend in the shed but work got in the way as a result I only got away late Sunday afternoon. I figured that a couple of hours was enough time to make up the spacers for the spacers fr my wheel conversion.
This is where I encountered my first problem, I was sure I had some 1" bar somewhere but couldn't find anything. I did have a length of 1.24" round bar, god knows where it came from but figured it would be easy enough to turn down to 1".

It didn't take too long but it seemed to machine differently from other steel I've machined, forming long spirals of swarf and judging from the colour generating quite al ot of heat in the process. I still managed to turn down about 6" down to 1", enough to make the largest spacer. Here it is awaiting the bandsaw.
The next step was to drill it through so the 3/4" spindle could pass through it. I started with a 10mm drill, drilling a pilot from both ends. However due to the length of the work piece it didn't actually meet up in the middle. This may have been a mistake but I decided to go ahead with the next drill up I had, a 21/32" with a morse taper.
The picture below shows the work piece after drilling through from one end. Note the discolouration caused by the heat generated.
This heat along with the fact that the work piece was solid in the middle are what I think led to the following tale of woe.
In the picture below the drill is stuck solid in the work piece at one end and in the tailstock quill in the other. The chain of events that caused this started with drilling the large hole from the second end. I found that the drill seemed to cut best when driven in using the tailstock ram with quite a firm hand.
This produced a lot of heat but appeared to work, until the drill broke through the previously undrilled section in the centre into the hole I had drilled from the other end. At this point the drill jammed.
I tried various things to get the drill out of the workpiece but only managed to make things worse by jamming the tailstock quill onto the drill bit.
An attempt to force the drill out of the quill's taper with simple brute force succeeded only in shearing the pins that hold the quill to the ram nut.
At this point I decided to stop with the brute force (i.e.BFO hammer) and use some more controlled force in the form of a press.
The press got the drill out of the quill which was a relief but I now need to fix the connection between the ram nut and quill before I have a functioning tailstock again.
But I think I've learnt an important lesson about stopping and thinking
before reaching for the hammer, especially because I now reckon that
simply running the lathe in reverse would have released the drill bit
when it first got jammed and avoid the grief my brute force resulted in.
Sunday, 17 January 2016
Drive Side done
Finished the drive side spacer. happier with the way this one turned out compared to the disc side (disc side is the one on the right). Surprisingly enough counter boring is easier with a counterbore tool.
Sunday, 3 January 2016
Disc side finished
Finished the disc side spacer today, the counter bores for the spacer to wheel bolts weren't 100% successful. I might invest in a proper counterbore set however despite that everything seems to bolt together nicely, here is the spacer bolted to the wheel....
and here is the disc bolted to spacer. I need to do the other side and then sort out the spacers to fit the wheel. Disc side spacer continued
At this point I am about to mill the counterbores for the cap head bolts to hold the spacer onto the wheel. Took ages to set up mostly because I'm still getting to know my mill.
Counter bores completed. I'm not sure I did them all to the same depth, I was getting tired and may have miscounted the depth I'll check today and correct if necessary.
Now I have everything set up I am hoping machining the pulley side will be less hassle.
Saturday, 2 January 2016
Now a project sportster.
Now that the TriBSA has moved from 'project' status to 'work in progress' I have allowed the Sportster to fall into 'project' status without breaking the 'one project at a time' rule.
It started with a blowing head gasket. Should have been an afternoons work but a nut dropped in the cranck case scuppered that plan (and my chances of attending the DGR).
I have got the nut out but not before removing the engine and half stripping it. As is often the case things have escalated and I now have a set of Andrews N4 cams to fit, behind a chopped cam cover. I also have a XR syle seat unit to fit.
A Mikuni performance carb may make an appearance before I get back on the road.
Oh and I've decided to stick a 19" front wheel on the back of the bike and run Goldentyre flattrack tyres. There is a kit available from Phil Little rac
ing in the states for this conversion but that is too easy so seeing as I had I lump of billet lying around I decided to make my own.
After making quite a lot of swarf I ended up with two spacers the correct size.
They even appear to fit.
I have bored housings for bearings and I now need to drill the holes to bolt the spacer to the hub and the disc/pulley to the spacer. I'm going to do this using my rotary table on the Bridgeport . To make sure the spacer is located centrally on the table I have machined up a sleeve that goes on the MT part of my tailstock die holder. It was while I was machining this sleeve I realise that the bearings I have are incorrect. I have ordered the correct ones so I'll be finding out how strong loctite 638 is at some point in the future...
Sunday, 26 January 2014
Burner progress
Been playing with the burner again. I've added a reducing coupling to the end to act as a flare, it's not theoretically correct (should be a 1 in 12 taper) but appears to do the job.
I've also picked up a drag and cope, so I'm closer to having everything I need to start sand casting.
Sunday, 29 December 2013
Propane Burner
One of my long term projects is a foundry to cast aluminium, I intend to use propane as a heat source so I've been building a propane burner.
Still needs fine tuning, the picture above shows it performing at it's best. Unfortunately it would appear that this performance was at least partially due to a tiny piece of swarf in the burner jet. When I changed jets as an experiment I noticed the swarf and removed it. It hasn't worked as well since.
Monday, 10 June 2013
Its still NOT a project....OK?
The Sportster was bought with the intention of being used as a daily rider (if I rode daily that is but you get the idea). I was adamant from the start that it wasn't a project and wouldn't be until the TriBSA was finished and de-bugged.
So far I've sort of managed to keep to that, its got a new seat, lost some chrome bling tat, got new bars, been returned to standard suspension, had the fork sliders powder-coated, had the forwards replaced with mids and an S&S air filter fitted. I plan to convert to a 19" rear wheel at some point and have started to collect the relevant parts. But I would like to stress that it is NOT a project.
So the Saturday before last I was on my way to visit Stuart in Mid Wales when I noticed what I thought was a blowing exhaust. I stopped and nipped up the exhaust bolt but as the miles went on I realised that things were getting worse and so exactly half way between Stuart's house and mine I admitted defeat and called the breakdown people.
I spent most of my spare time last week stripping the bike down. This is where I got to on Sunday but I had to stop because of a lack of 12pt (bi-hex) sockets for the cylinder head.
So far I've sort of managed to keep to that, its got a new seat, lost some chrome bling tat, got new bars, been returned to standard suspension, had the fork sliders powder-coated, had the forwards replaced with mids and an S&S air filter fitted. I plan to convert to a 19" rear wheel at some point and have started to collect the relevant parts. But I would like to stress that it is NOT a project.
So the Saturday before last I was on my way to visit Stuart in Mid Wales when I noticed what I thought was a blowing exhaust. I stopped and nipped up the exhaust bolt but as the miles went on I realised that things were getting worse and so exactly half way between Stuart's house and mine I admitted defeat and called the breakdown people.
I spent most of my spare time last week stripping the bike down. This is where I got to on Sunday but I had to stop because of a lack of 12pt (bi-hex) sockets for the cylinder head.
On Tuesday a trip to Halfords got me a set of bi-hex sockets and by the end of the evening I'd got to here.
Now I'm not 100% certain but I think that this is the cause of what I thought was a blowing exhaust, a blown head gasket.
Thursday saw me remove the barrels. At this point I decided that the components I had taken of the bike looked a bit cosmetically challenged, which is why, on Friday, I took a detour on the way home to drop the barrels, head and rocker boxes off at Griffs in Bristol for powder coating. Oh and the head nuts were dropped off for zinc plating despite the fact that they are either hidden from view or under covers.
Saturday arrived and I got a load of stainless nuts and bolts from Steve's Stainless at the Cheltenham Autojumble.
So I now have a bike in bits, waiting for cosmetic work and replacement of rusty fasteners but..... its STILL NOT A PROJECT....
Wednesday, 20 March 2013
Sportster evolution.
The Not a Project Sportster moves on. I managed to damage the air-cleaner backing plate. Getting a replacement would take a couple of weeks. I ordered an S&S air filter kit on Monday from Cheltenham HD. It arrived the next day.
Wednesday, 26 December 2012
Sportster Unslammed.
One of the guys on Dirty Bobbers mentioned that he wanted to lower the suspension on his Sportster, as I've never really liked the 'slammed' suspension on mine I got in touch with him and a swap was arranged.
The picture above shows the difference between the length of the shocks and the picture below whows the difference between the fork springs...
Sunday, 22 April 2012
Sportster done.
Bled the brakes on monday left them with the lever strapped up for a couple of days and everything is working as it should. Rode over to Hay on Wye. Like the new bars but thinking of going for rear sets....
Also been thinking of getting some stock length shocks.
Monday, 9 April 2012
Chocolate Zombie Jesus Day
I've never been that keen on the 'cruiser' stance of my sportster and have been gathering parts to modify it to my taste. Yesterday I spent a few hours in the workshop installing a set of Biltwell tracker bars and attempting to fit a set of mid controls.
I've ordered a few fasteners from www.westfieldfasteners.co.uk and a 'clevis footrest mount' from http://www.jerseyh-d.com. I need to order a shorter front brake cable but that will have to wait until tomorrow when the shops are open and I can speak to a human being rather than rely on websites.
Wednesday, 1 February 2012
Motorcycle graveyard.
As part of my clear up I've put all my non functioning bikes in a corner.
There's three motorbikes (three and a half if you count the BSA hardtail frame) and a mountain bike in this picture.
I put some shelves up yesterday, I now have a shelf just for helmets and another just for bike tanks.
I quite like having a place for everything and everything in its place. I bet it will be a tip again within a month though....
The big tidy.
Since I had the pins out of my foot I've been making moves towards really getting stuck into my TriBSA street tracker project. The first thing to be done was sort out my bandsaw. Since buying my secondhand bandsaw I've found its the single tool I use the most, the downside of this is it always seems to be in the way. This is probably because the flimsy stand it came with means it is difficult to move around so it gets left in the middle of the workshop which means its always in the way.
So I got out some 2" box section I got from the scrapyard and welded together a stand.
The new stand is more stable and sturdy. It's also a more convenient height but most importantly the saw is now easily mobile thanks to a set of castors.
After sorting the stand out I've spent a good few days sorting and tidying the shed. I've now got space to move without tripping over.
So I got out some 2" box section I got from the scrapyard and welded together a stand.
The new stand is more stable and sturdy. It's also a more convenient height but most importantly the saw is now easily mobile thanks to a set of castors.
After sorting the stand out I've spent a good few days sorting and tidying the shed. I've now got space to move without tripping over.
Subscribe to:
Posts (Atom)